This was a very fun, little project and a nice refresher in the hand-painting department. The original concept is from a good friend Aaron Hain whose work you can find here: http://aaronhain.daportfolio.com/

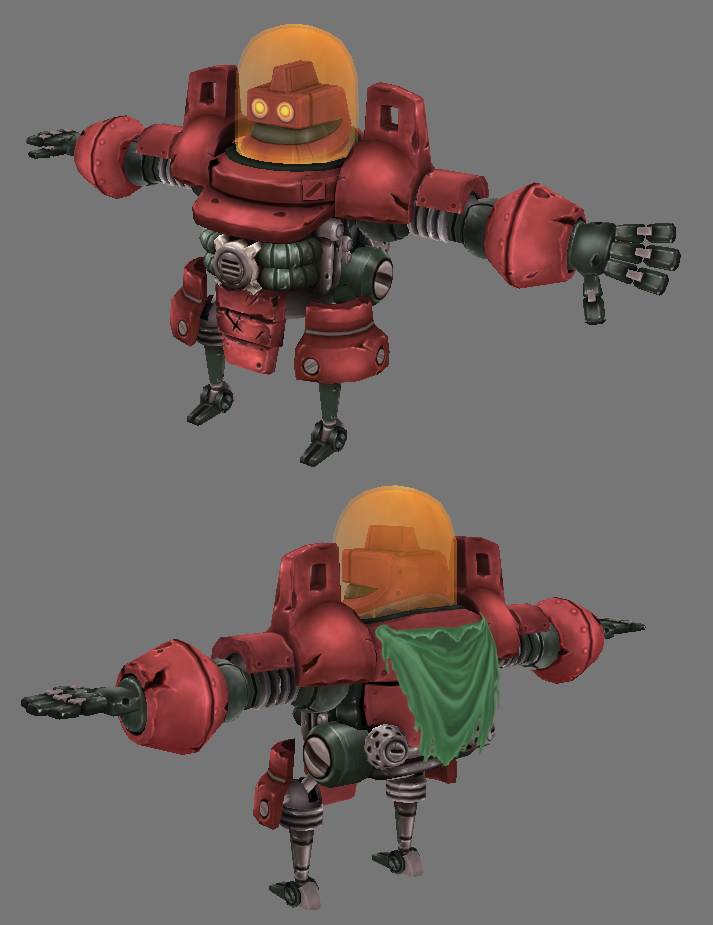
He was kind enough to lend me the design to model, and what a design it was. I tackled it best I could, first by modeling the simplified shapes in Maya, doing a basic sculp in Zbrush, then baking those shapes out in Turtle and hang painting from there.

The initial paint was colorful and fun, painting in highlights that would exist had the model been lit, but it did require a lot of thinking outside the box to make lights and shading happen that wouldn't normally exist, only because it made the model look to have a softer look, and as if it were lit from a number of different directions at once. 


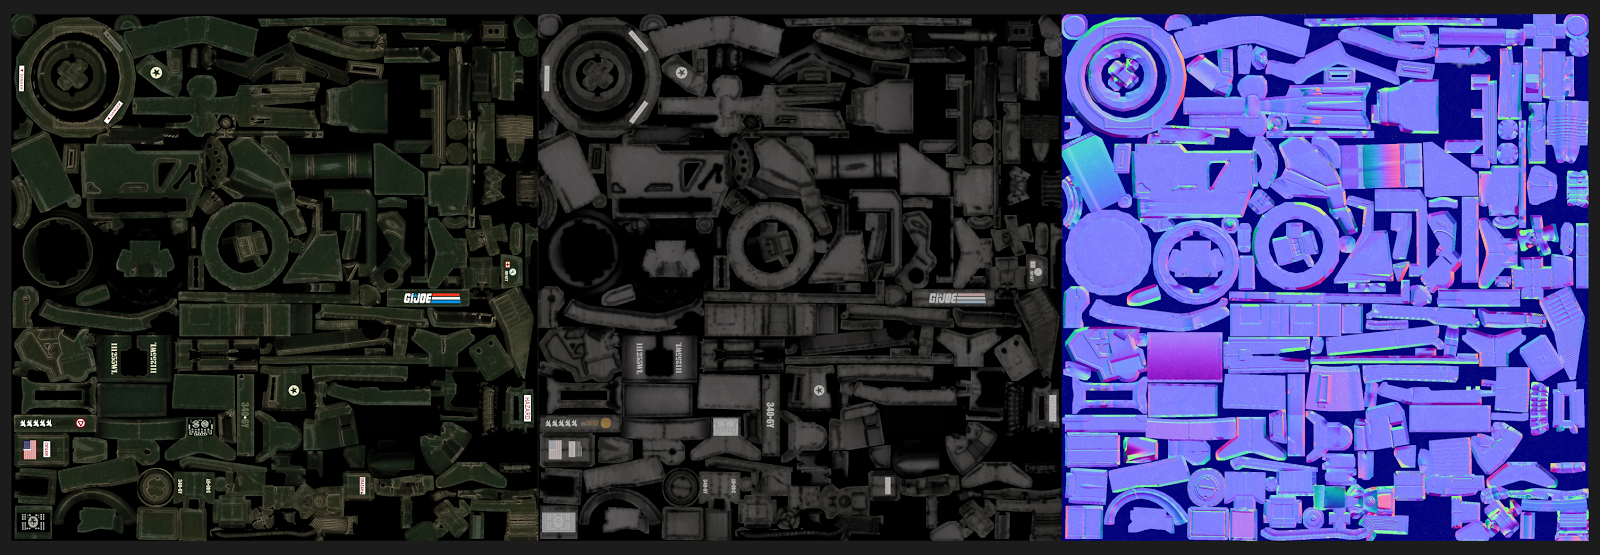
 Then from there was the complicated part... the moss. I started by creating the moss paintings, one half of the two textures used to make up the robot, his accessories and his pedestal, pictured below.

Then from there I pieced together the many moss planes onto the robot in a believable manner (I think). It was fun, but time consuming, and the best part was that it allowed for me to save textue space on Moss's first texture sheet, since most of that is mirrored on his model. Using the moss, I could add an asymmetric design to make him more interesting.


0 comments

You know whats always fun? If you answered "a pile of skulls," then you're correct!  Recently I worked on a small project where I was making a pile of skulls and for the project I wanted to test out a few new tools:

  • Dynamesh in Zbrush: I had never used it to retop a model before decimation master.
  • 3D Coat: I've used it for unwrapping a model, but yet to really delve into the retopping process from a highpoly reference mesh.
  • Marmoset 2.0: it looks gorgeous, I've had some of my stuff rendered in it, but I've never actually touched it myself. 
So without further ado, my process!
The actual forming of the skull wall was actually fairly easy. Sculpt a skull in zbrush, make a bunch of instances of said skull, add a bone here or there and throw them in a pile! Looks great, totally natural, and no actual human heads were harmed in the process. Two thumbs up... but wait 1.5 million tris... uh oh.

Taking that mess of a high poly model, I decimate in Zbrush and head over to 3D coat! From there, after getting the initial hang of navigation (because no two 3D programs apparently work the same), I really actually like how 3D coat retops a mesh. Its smart, easy to adjust and much quicker than Zbrush ever was (less painful too).

3500 tris hmmmm?... Lower poly: check. Clean (enough) and the silhouette is still good: check. But for the purpose that I want to use this skull wall, 3500 tris was still far too large.  If I'm going to populate a scene and make a number of "walls" from this guy, I decided further cleanup was needed, so I continued to merge polygons and verts by hand, keeping the silhouette and texture space, but lowering the polycount to ensure optimal use of the model.  


Some texturing in photoshop and dDo, a bit more tweaking of materials, and I was pretty happy for the time I had spent on it, and from my first time using a number of tools I had recently learned so much about. Not perfect by any means, but I definitely learned a lot, which should always be the goal from any project! Not to mention, I can definitely see the benefits of both Dynamesh and 3D coat as tools. :D


0 comments
 Ever felt like making a cast iron, "ye olde" feelin kitchen set? Well now I never will again.

That said, some gritty, high poly kitchen ware.  I used this project to practice different textures and shaders, and pretty happy with how everything came out, especially the metals and stitching on the leather.

Low poly in maya, sculpted in zbrush, baked with turtle (finally getting the hang of it, and textured in Photoshop with some helpful assistance of dDo.


0 comments
Posting some recent progress on a Flak gun I modeled and textured. This guy was a good little challenge of hard surface modeling in Zbrush and my first time using the Turtle baking in Maya 2015.

Turtle is a tricky little bugger, but once you have all the settings down and figured out, it is by far, one of the most powerful baking tools out there. While I still had a bit of cleanup to do with my normals, it still gave some incredible results seen in the renders.

Otherwse, this was a good learning expereince when it came to making my own brush alphas in Zbrush and rendering in Marmoset.

All in all I'm super happy with the outcome of the model. With lots more to come! :)


Model and Textures by me
Nick Vigna helped with renders in Marmoset 2
...
0 comments
 One project I always found a lot of value in was re-purposing an asset.  It not only saves production time, but can be a true test of skill when it comes to taking a model and finding another purpose for it, or in this case, another context.

For these tikki's I was given a single quick doodle. From there I treated the Tikki like any object, seeing how I could use it to the most of its ability and give it more than one purpose.


So I modeled and textured the tikki, keeping it lowpoly, and basic. A wood carved, worn design.


From there I chose 3 different styles of tikki in 3 different contexts: Swamp, Underwater Cave, and Industrial park. And from there I fleshed out the styles of all 3 tikkis.

Swamp
Underwater Cave
Industrial park


0 comments


On Forza 5 one of the main tasks I was in charge of was collideables. Making sure they reacted and play nicely with cars and creating the collidable models and textures, like this British Mailbox.


Low poly and meant to look photorealistic, it was a fun and quick project.

0 comments


After a long year of working at Microsoft, I was finally able to talk about my involvement working on Forza 5.

If I'm going to be honest, I will say that it was definitely a different experience than I had initially thought it would be.  I was actively involved on the Track Team doing anything from lighting bugs, to flickering polygons, or fighting alphas in the crowd groups within the racing stands.

The bulk of my work was making sure collision and objects within the world worked properly.  I did however get to work specifically on some environment props on the main courses.

One area of the team I was specifically in charge of was tirewalls, making sure they seamlessly flowed from one wall to another. I was also in charge of modeling and texturing said tirewalls.


Finally my tasks, while long and tedious at times, were incredibly important to the learning process of how a AAA games really works. I respect the work my team did and am happy to say the game couldn't have happened without the work we did. Small bugs may be minor tasks, but when you put together a couple hundreds "small bugs" you essentially have the difference between a working game and an absolute mess.


1 comments

So after a dead flash drive and a few more days than I could afford, I finally got this guy low poly, textured and rendered out.

I'm satisfied with the texture, but after sitting and bustign it out, I'm gonna walk away and come back to it, as I'm sure I'll find something I can do better.  Either way, I'm really happy with how the maps turns out, the diffuse was fun to paint, and I think this is one of the first models that I've ever actually needed a glow map.

Hand painted robot Codename Robo 00, done.  1024 Diffuse/Bump/Spec/Glow and around 7400 tris.  Questions/comments/critiques always appreciated. :)

Now to rig and pose this guy before portfolio review!


3 comments
Nothing like locking yourself in a room for a week with friends working on a mock-up MMO.

I was in charge of putting together simple environment work, trees, rocks and bushes.  But my favorite part of the project was getting to unwrap and texture characters.

Rough character models were done by Grace Galarosa. Finished, unwrapped and textured/rendered models were done by me.

I was going for a low poly hand painted feel.


With a little under two weeks until I gotta have all my stuff together for portfolio, I'm in polish mode.  Making things look more clean and more shiny, or in some cases grungy and bumpy. 

These are both just first passes and require more polish, but i like where they are going. The first Sal the salamander (working name). And the second an npc enemy known as the Porker (again working name).
0 comments

 As I come back to the real world after a year at Microsoft, It's nice to just re-visit some old ideas and concepts. Posting some interface updates as I get back to design and 3D. Look for some more updates later this week.

A game fighting game interface.

A flight sim game interface.


A redesign of a well known site trying to make it more organized or user friendly. Providing more information on one page where there is already so much going on.


0 comments

Forkin Orks, was a fun project.  Full of hand painting, modeling and texturing for me.  The main concept of the project was a hack and slash with an old farmer as the main character.  The farmer uses a special pick fork that transforms based on combos and killing of a group of orcs.  Full of crazyness,  but fun all the same.  I was tasked with designing, modeling and texturing the characters of the game, in the span of two days. Easier said than done, but done none-the-less.  I was pretty happy with the end result but may go back later and touch em up.  
Early Concepts

 Low poly models.  Both roughly around 1200 tris
 

Textured models and texture sheets.


I also got to do the fully animated farmer moves and a bit of concept art of the endscreen where your stats are posted.  
0 comments